WaveAlign Quick Start Guide

Introduction
waveAlign is designed to give DJs more control over their sets by normalizing loudness levels across tracks while preserving the original dynamics. This manual provides guidance on how to install, configure, and use the software effectively.
While our team thoroughly tests the product and uses it regularly during their own performances, waveAlign is still modifying your audio data.
Therefore, we strongly recommend making a backup of your music library before using WaveAlign to ensure your original files remain safe.
Installation
WaveAlign supports both macOS and Windows. Download the respective version on the download page you're redirected to after your purchase.
Mac Installation
Drag and drop the WaveAlign icon into your Applications folder. Double-click the app from your Applications folder and confirm with ”Open” when prompted to launch the application.
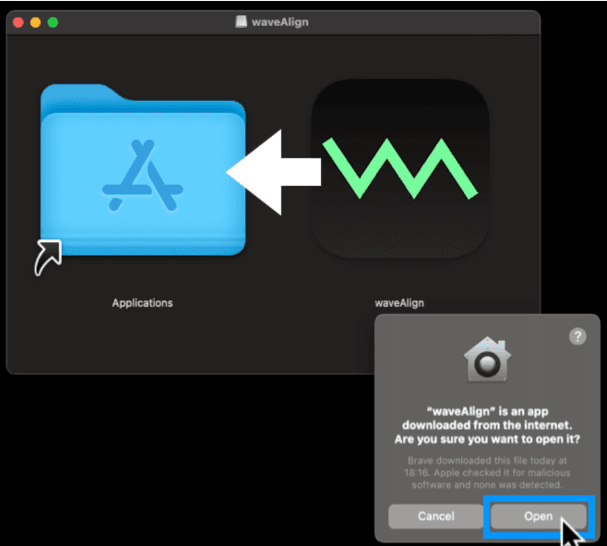
waveAlign installation for OSX (Mac)
Windows Installation
Double click the downloaded installer file to launch waveAlign installation. waveAlign will install into a directory of your choice. Then double-click WaveAlign.exe to launch the application.
waveAlign Windows (Microsoft) installation
User Interface Overview
- Open Folder – Displays the selected input folder containing the audio files to be processed. Click on ”Browse” to navigate using your file-system
- Drag & Drop Area - Drag the folder containing your audio files or the audio files themselves over this area to select them for processing
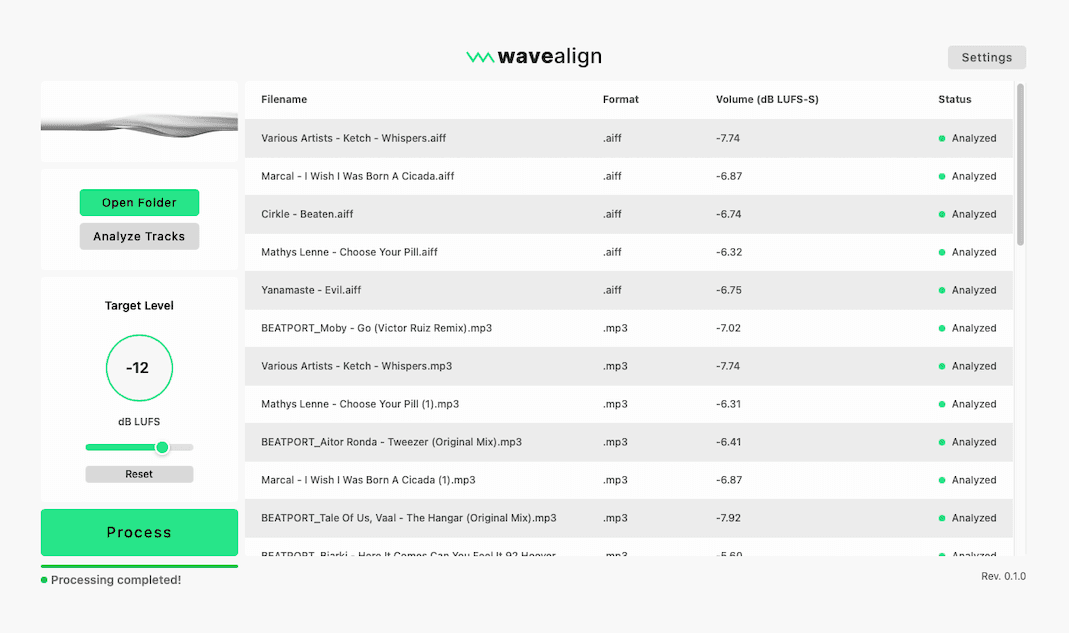
- Target Level (db LUFS) – Sets the loudness normalization target in LUFS. All files will be aligned to this level. We recommend -12 db LUFS for best results.
- Process – Initiates the processing of all audio files according to the set options.
- Analyze Tracks – Prevents modifications to the original files. Files will be analyzed but not processed or written.
- UI Brightness selector - Switch between dark and light mode
- Settings – Opens a window with advanced settings that can be enabled or adjusted.
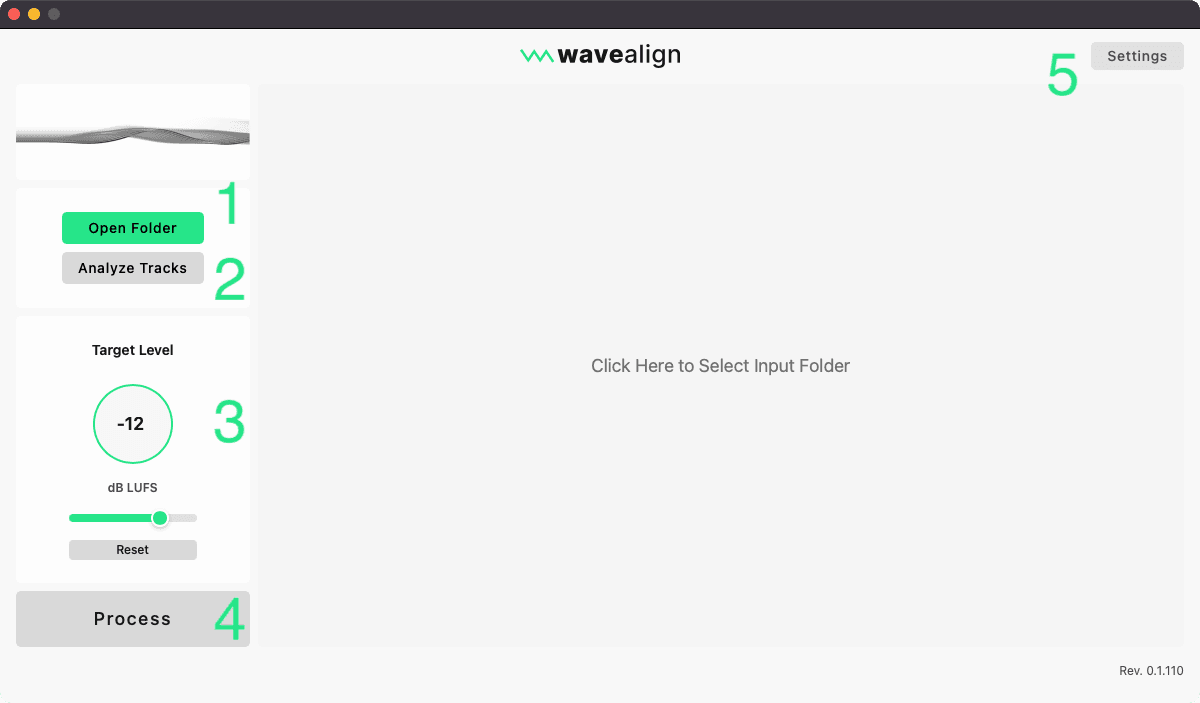
waveAlign main interface
Settings Menu
- Backup – Defines where original files will be saved. Click on ”Browse Backup Folder” to navigate using your file-system.
- Enable true-peak limiter - Enables waveAlign to safely increase a track’s loudness
- Use limiter for MP3 files - Enables the limiter for mp3 files. Please see the info icon for more information.
- Additional Table Columns – Shows “file format” and “peak levels” on the processed track, to have a more complex view.
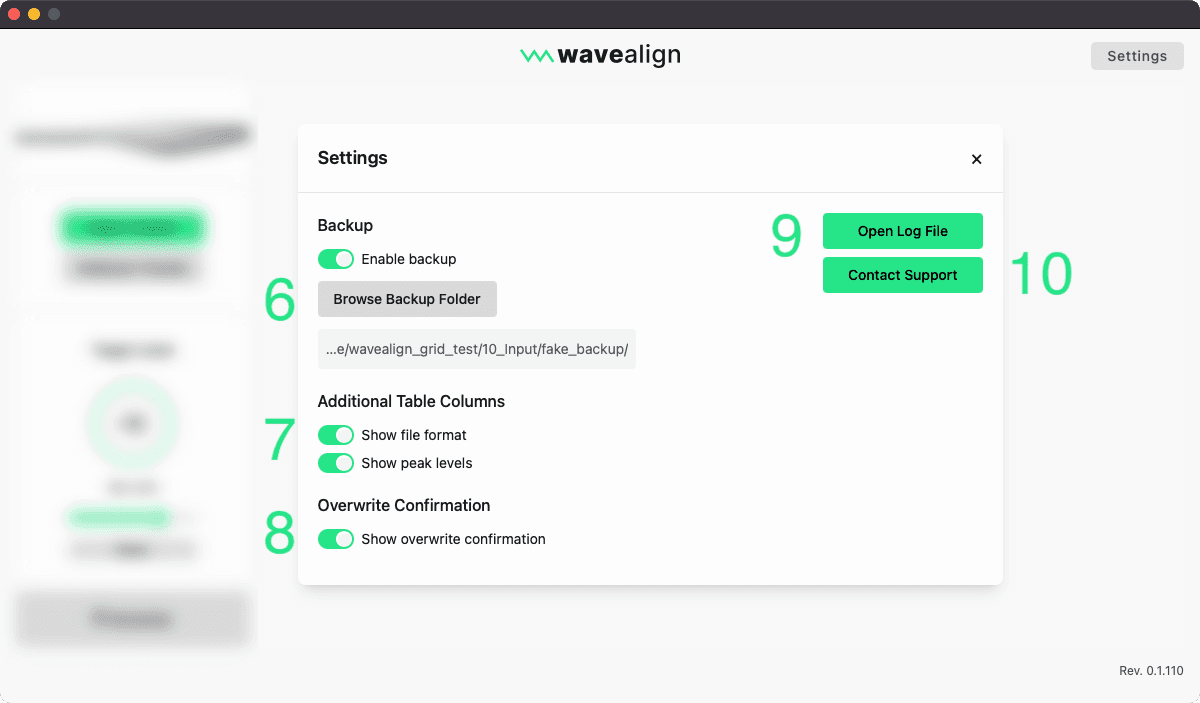
waveAlign Settings Menu
Processing Option
There are two approaches to processing your audio files with WaveAlign:
USB Drive Processing
Choose this option to process all tracks on a specific USB drive. This is ideal if you want to leave your main library untouched on your computer and only normalize tracks for a specific performance on your USB stick.
WARNING: Do not process FLAC files directly on your USB stick. Only process FLAC files on your local machine and import through Rekordbox or other library management applications.
Local Library Processing
Choose this option to process your entire music library. This is beneficial if you want to normalize all your tracks on your computer at once and avoid reprocessing each USB drive when adding new music. When processing your library you need to force synchronization of the modified files on your USB drive. We recommend fully formatting your drive and freshly applying the normalized library on it.
Output Location
If you want to overwrite your original files, set the output folder to the same location as the originals. To keep the originals, choose a different output folder.
Track Status
Each track can have one of the following statuses, indicating its current state in the system:
Processing: The track is currently being processed Processed: Processing for this track has finished Skipped: The track could not be processed. Hover your mouse over this status to receive more information Cached: The track has been processed before to the same target dbLUFS. Therefore it was not processed again Analyzed: The track was analyzed without being modified
Best Practice
- USB Drive Processing is recommended, as a stick can easily be wiped and set-up anew with your library.
- See "USB Drive Processing"
- If aligning your main library, always back up your music library before processing.
- You can also activate waveAlign's backup function, however be aware that this is still a Beta version. We recommend you to backup your entire library manually to be safe.
- Start with a small batch of files to test your settings before processing your entire library.
- The overall volume of your tracks processed with waveAlign will likely have a lower level to DJs not using waveAlign. You might need to adjust it when taking over at a gig.
- We recommend a target LUFS-S level of -12dB.
Getting Support
If you experience any technical difficulties or have questions, please contact our team at contact@wavealign.app or click the contact support button in the app.
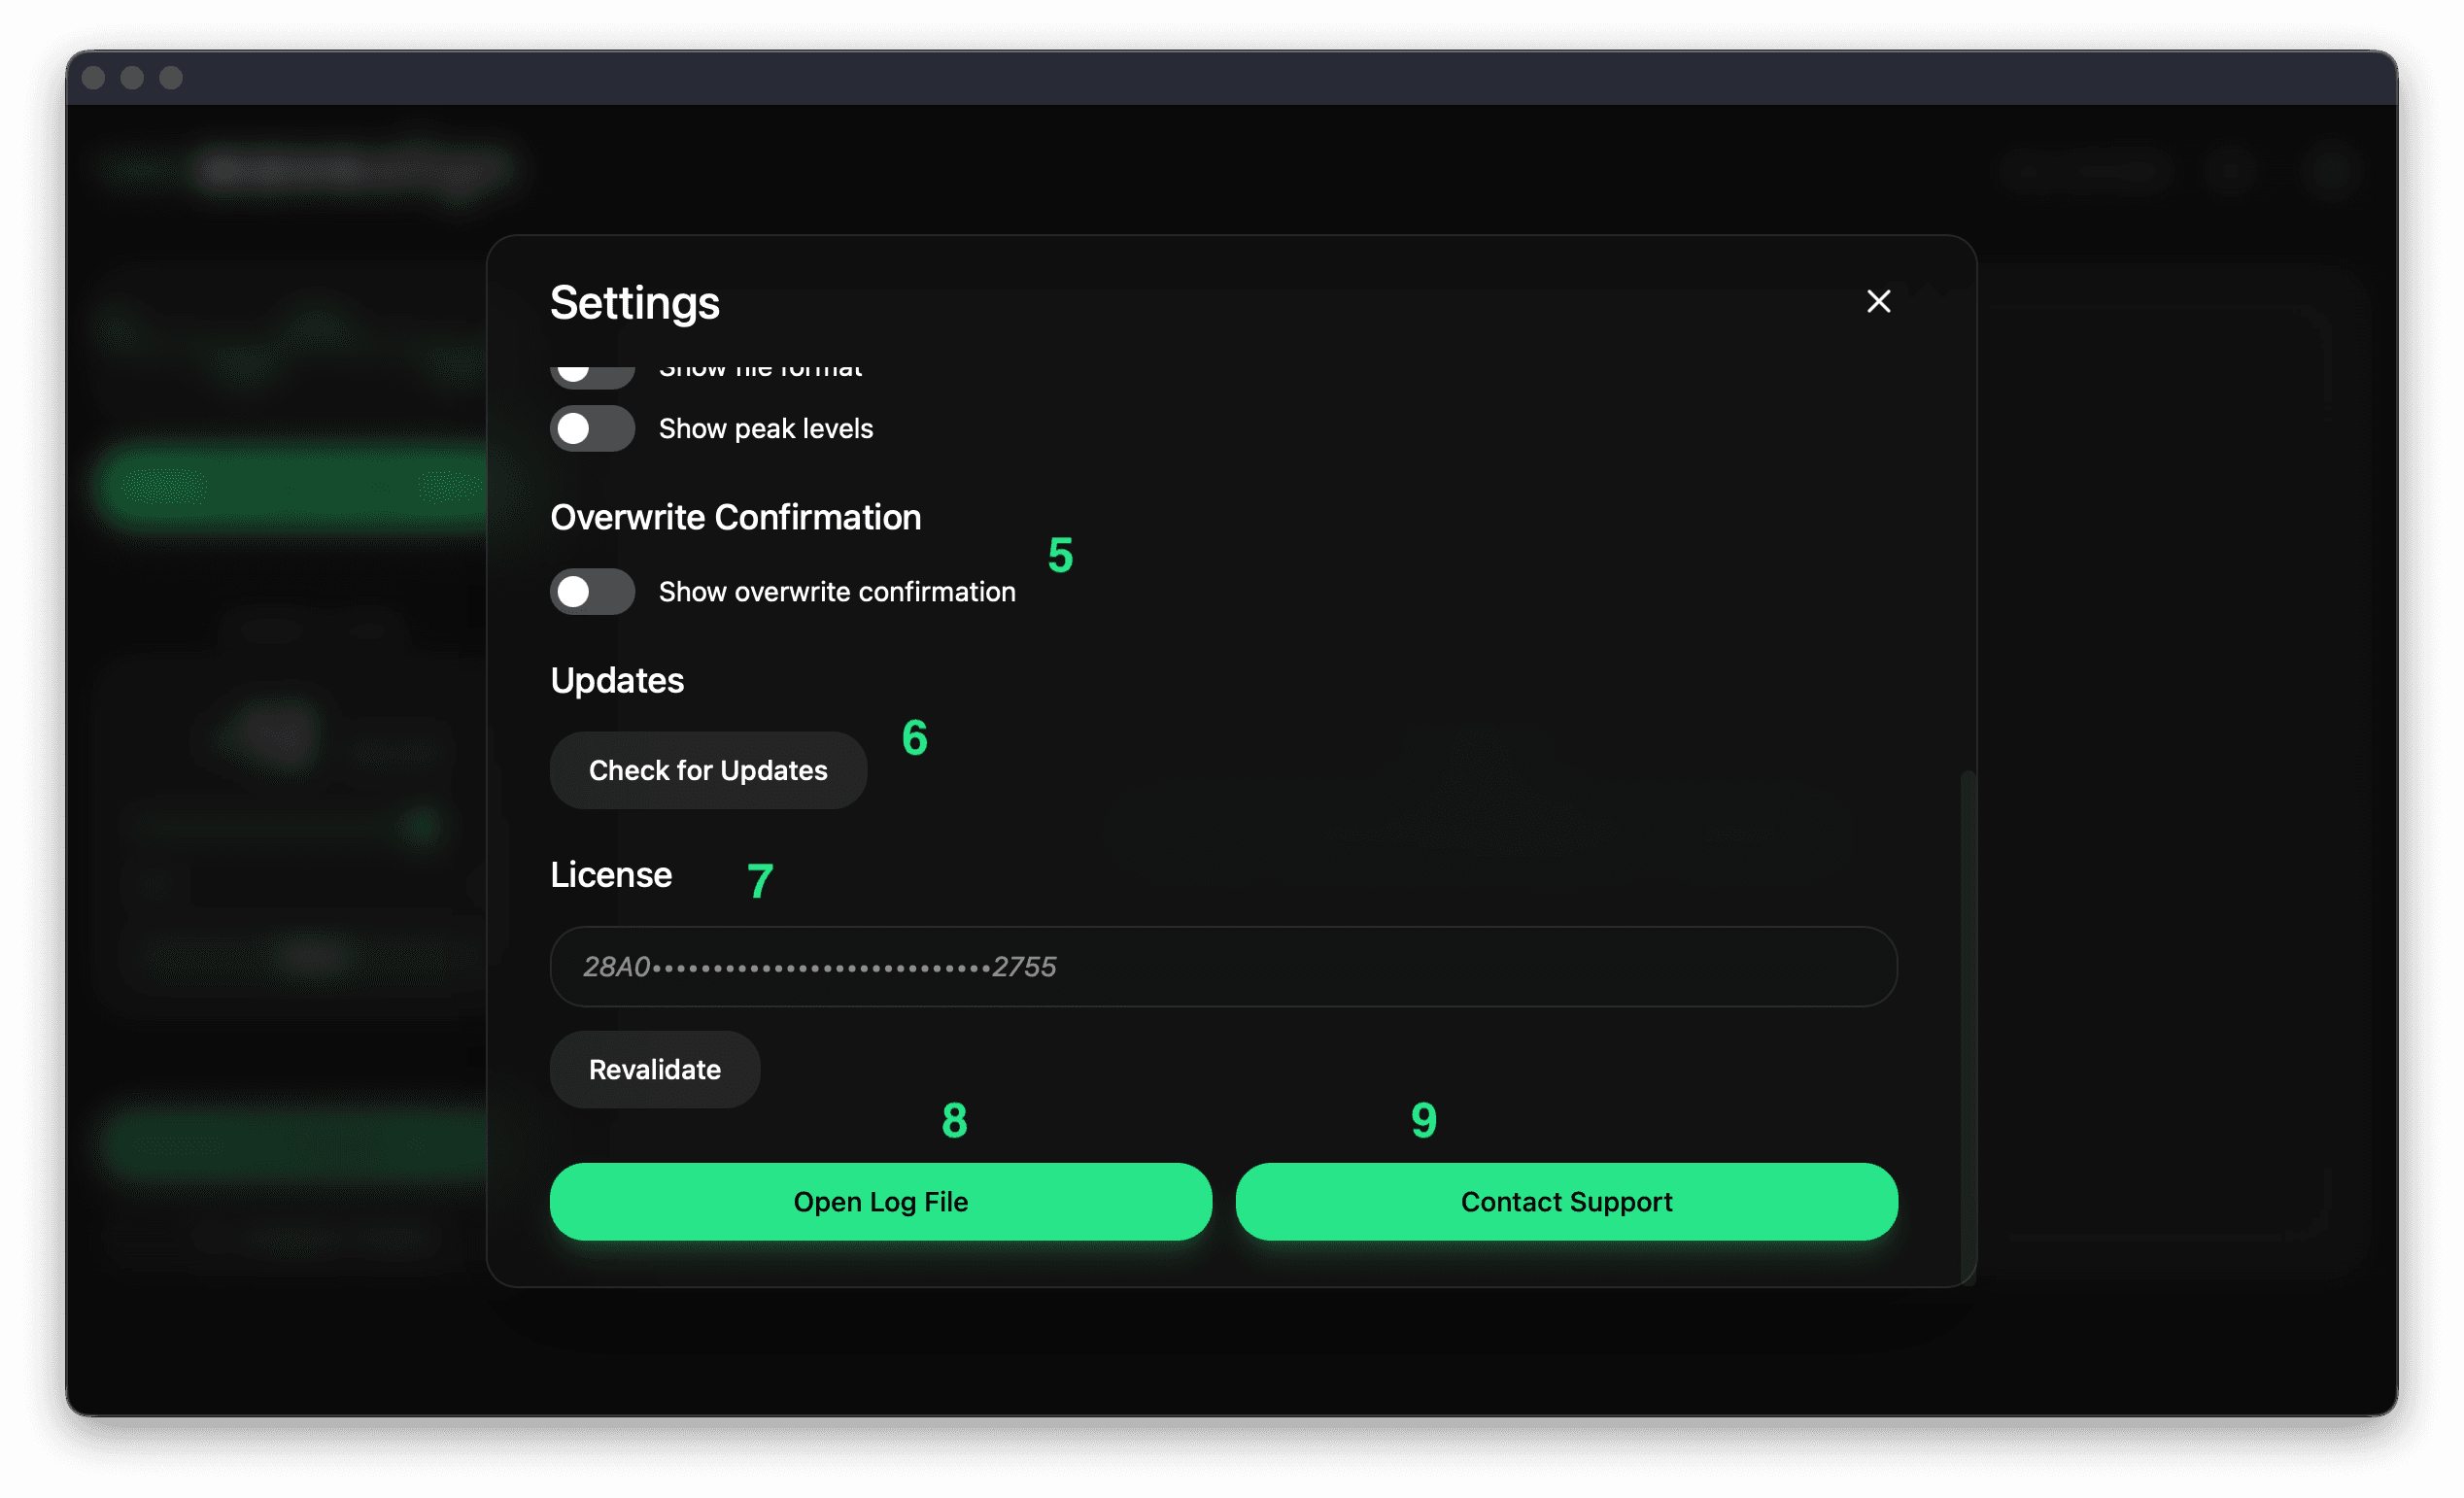
Second part of the waveAlign settings menu
Like what you see? Share with a friend.
Davide Benincaso
Davide is a musician and producer from Italy, based in Stockholm. As a member of the waveAlign team, he manages the QA processes, bringing a meticulous and precise approach honed from his background as a QA Lead for music tech startups. His dual expertise in both music production and technical quality assurance ensures that waveAlign delivers a robust and artist-focused experience.
Ready for perfectly balanced audio?
Try waveAlign and experience consistent loudness across your entire library.
Buy Now